Archive for Amy

Chilled Double Tomato Soup Recipe

tomatoes on tableThis came from Barbara Goede. It is an unusual way to use tomatoes from the garden. She recommends gourmandeinthekitchen.com.

Chilled Double Tomato Soup Recipe (Raw, Vegan, Paleo)

Prep Time: 20 minutes

Total Time: 2 hours, 20 minutes

Serves: 4

Read more: http://gourmandeinthekitchen.com/2013/chilled-double-tomato-soup-recipe/#ixzz2cujWjbsZ

Spring Spanikopita Recipe

span photoLois Harvie is a volunteer for Local Organic Meals on a Budget and made one of the appetizers for our media event.  Spanikopita is a great way to get your family to enjoy fresh spinach! Spring greens are in season this time of year and there is an assortment of wonderful seasonal spinach, chards and mustard greens available at your local Farmers Market right now.  Be sure to check out some fresh local cheeses while you are out and about as well. This recipe uses local goat feta from Windmill Dairy and their wonderful grated pecorino romano. We also add a handful of fresh mint and nutmeg to give it a fresh spring flavor.  Spanikopita is easy to make and will impress your guests.  Folding the triangle pouches takes some time, but its great fun if you get your friends or family together and turn it into a group cooking project.  Consider making them in advance and freezing some for later. You can have them ready to pop in the oven anytime!


Ingredients:

Makes 48 triangles, serve 2 per person

$18.42 or $.77 per serving

1 lb of fresh organic spinach (check out your local Farmer’s market

1 cup of local feta  crumbled (Windmill Dairy)

½  cup pecorino romano or parmesan (Windmill Dairy)

1 medium yellow onion chopped

2 tablespoons of olive oil

3 cloves of garlic

1/2 teaspoon of nutmeg

1/3 cup of fresh chopped mint

½  cup of salted butter (melted)

1 lb of frozen phyllo dough pastry


Directions:

  1. Take out phyllo dough and defrost in refrigerator overnight
  2. Preheat oven to 375 and line 2 baking sheets with parchment.
  3. Rinse spinach and pat dry.
  4. Chop onion and mince garlic.  Heat oil in sauté pan and add chopped onion and garlic and sauté for 5 minutes until translucent, add spinach to pan and cook down until wilted about 8 minutes.
  5. Let cool for a few minutes then remove from pan and drain excess moisture using a colander.
  6. Mix the spinach mixture with feta cheese, pecorino romano cheese or parmesan cheese, in a bowl.  Add chopped mint and nutmeg and mix.
  7. Arrange one roll of phyllo dough on a clean work surface and Cut the phyllo lengthwise into 3  strips.
  8. Take 2 strips and brush top one with melted butter.  Be sure to cover the remaining phyllo dough with a damp towel to keep it moist, but do not let it get too wet or it will get soggy. Prepare them 2 at at time as to keep your process moving!
  9. Place about 1 tablespoon of the spinach mixture on the bottom of each strip. Take the bottom right corner and fold the dough over the filling to make a triangle. Fold the bottom left corner up to make another triangle. Continue folding until all the dough is folded.
  10.  Arrange the stuffed triangles, seam-side down, on the prepared baking sheet. Lightly brush the triangle with butter. Repeat with the remaining phyllo dough and spinach filling.
  11. Bake in the preheated oven until golden brown, about 20 minutes. Cool slightly before serving.
  12. You can bake half of the Spanikopita and freeze the other half. To do this, freeze the triangles on the baking sheet for one hour until solid, then place triangles in a re sealable plastic bag. When you’re ready to cook them, just pop them in a preheated oven and enjoy!

See more recipes and tips from Lois at:

newlifenewbody.com

Quinoa, Strawberry and Rhubarb Pudding Recipe

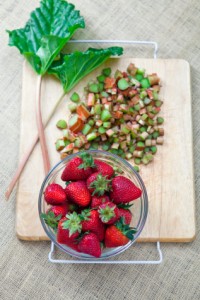
Rhurbarb SmallI have rhubarb coming up for the first year in my garden. It started last fall when we received some extras from a farm and had to find places for them. Rhubarb and me have not had great luck together. It was planted the first two years that I gardened here and did not come back the following spring. I gave up for a few years. Then, my dad told me to plant it in aged horse manure (about a year old) and it would love the first year when you can not eat it.  You should not pull it for the first year to get it to grow larger in your space. One tip is to pull the stalks off instead of cutting them. I got two plants and started them in manure and they loved the area last year. They came back this year in a dry garden plot and it tastes great.  You can only eat about half of the rhubarb the second year.  Next year we will have a lot more pudding.

This is a great way to enjoy the spring rhubarb and strawberries with quinoa. I recommend rinsing the quinoa in a colander in the sink about four times before you use it. There is a covering called saponin on the quinoa to protect it from birds eating it in the fields. I like to rinse it about four times to make sure it is removed. It is a relative of tapioca so it makes sense to make a pudding. Enjoy.

Amy Hetager, Local Organic Meals on a Budget Blogger

Quinoa, Rhubarb and Strawberry Pudding

EATING WELL MAGAZINE

6 servings at 2/3 cup

2-1/4 cup water, divided
1-1/2 cups chopped rhubarb
1 cup strawberries
1/3 cup organic quinoa (rinsed 4 times)
1/2 tsp cinnamon
Pinch of salt
1/2 cup sugar (I use coconut) plus one tblsp
1/2 fresh lemon zest
1 tblsp cornstarch
1 cup plain Greek yogurt
1 tsp vanilla extract

  1. Combine 2 cups water in a medium saucepan with rhubarb, strawberries, quinoa, cinnamon and salt. Bring to a boil, then reduce heat and simmer.
  2. Cover and cook until the quinoa is tender, about 25 minutes. Stir in 1/2 cup sugar and lemon zest. Whisk cornstarch with the remaining 1/4 cup water in a small bowl. Stir into the quinoa mixture, return to a simmer and cook, stirring constantly, for 1 minute.
  3. Remove from heat. Divide the pudding among 6 bowls. Refrigerate until cool, about 1 hour.
  4. Just before serving, combine yogurt, vanilla and the remaining 1 tablespoon sugar in a small bowl. Top each serving with a generous dollop of the vanilla yogurt and fresh strawberries, if desired.

Also printed on Beneficial Farms CSA

Green Tomato Recipes

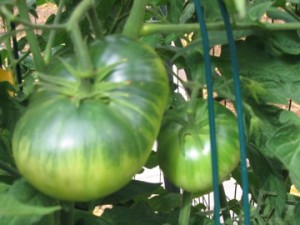
Many of you had tomato plants freeze over the weekend in the first freeze below 30 degrees.  If you left tomatoes on the plant they froze and can be cooked and eaten but not re-frozen. If you rescued them before the freeze, they can be on the counter in the sun or my great-grandmother wrapped them in newspaper to have them ripen. They will not taste like the summer tomato, but will be tastier than buying them from the grocery store. Many think about fried green tomatoes as a recipe, but there are many salsas, chutneys, pies and other dishes that you can make with them.  Here are a few.

Amy Hetager, Local Organic Meals on a Budget Blogger

Green Tomato Chutney
From Simply Recipes
This is a great blog to follow and I have cooked several of her recipes.  This one is a good way to make a large batch of chutney and share with friends.
Click here for recipe

Pickled Green Tomatoes
From Food in Jars Cookbook
This is a great blog to teach people how to can and preserve food.  Good recipes for jams, salsas and these pickled tomatoes. The cookbook came out earlier this year.
Click here for recipe

Fried Green Tomatoes with Vinegar Sauce
From Bon Appetit
Here is one of the classic recipes updated with a great sauce.
Click here for recipe

Green Tomato Cake
From Beneficial Farms CSA?Here is a recipe that I have made many times and is sweet with the bitterness of green tomatoes.  I picked my tomatoes about a month ago for our first freeze and they have all turned to a ripe red color. Try this cake for a potluck or Halloween event as it is fun to share.
Click here for the recipe

This blog article also appeared on Home Grown New Mexico’s blog

Corn Tortilla Recipe from Lois Ellen Frank

Lois Ellen Frank had a great class last month to teach us how to make tacos.  Here is the recipe that she used for corn tortillas.

Corn Tortillas

From the Taco Table Cookbook

© Lois Ellen Frank

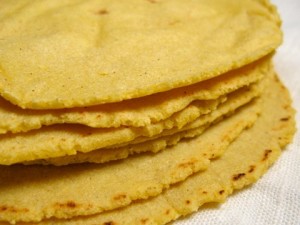
Corn tortillas are available in all supermarkets today and are certainly an option when making taco dishes, but I would really encourage all of you to make your own homemade corn tortillas, even if only once.

I can almost guarantee, however, that once you’ve held the dough in your hands, and placed it onto a cooking comal or skillet and made into fresh warm, moist, corn tortillas you are sure to be a convert.  I didn’t grow up making corn tortillas on a daily basis so when I started to make them from scratch it seemed a little bit foreign to me.  But once I realized how easy it was to do, how delicious the tortillas were to eat, and how much I enjoyed the process, I now make corn tortillas all of the time.

Both Alma Aguirre-Loya and Noe Cano grew up with mothers that made tortillas every day.  Alma, who is from Northern Mexico, had either corn or flour tortillas on a daily basis, while Noe always only had corn tortillas.  Alma continues today to make tortillas every day for her children, while Noe teaches how to make tortillas at the Santa Fe School of Cooking in Santa Fe, New Mexico in their cooking classes.

Below is the recipe as I was taught how to make corn tortillas from both Alma and Noe.

2 cups Fresh Corn Masa Flour or Maseca brand corn masa flour

1-teaspoon kosher salt

2 cups water

In a medium-size mixing bowl, combine the corn flour and water and mix together until you have formed a dough.  You can do this with a spoon, but I always use my hands.

After the corn flour and water is completely mixed, using your hands form balls just smaller than a gold ball and set aside.

Preheat your comal or cast iron skillet so that it is hot.

In a tortilla press, place one ball in the center of the tortilla press and press together to make one corn tortilla.  I use a plastic bag that I cut in half leaving a seam on one side so that I can place the corn masa ball inside the plastic so that it doesn’t stick to the tortilla press.

Remove the tortilla and place on the comal and cook the first side of the tortilla for 10 to 15 seconds, then turn over and cook for approximately 30to 40 seconds, then turn over again and cook until it puffs and the tortilla is done.

Place the cooked tortilla in a kitchen towel inside a basket or bowl and prepare the next tortilla following the same steps.  Stack the tortilla on top of each other to keep them warm inside the towel.

Serve warm with your favorite taco recipe.

Makes 16 corn tortillas.


Cooking Beyond Recipes- Green Chile Apple Chutney Recipe

Nadine has a bounty on her apple tree and made the following recipe this fall. Thank you for sharing.

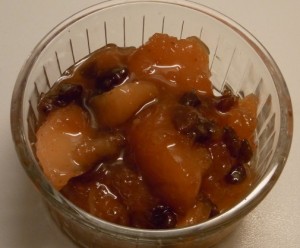
Nadine’s Green Chile Apple Chutney

2 medium onions, chopped
2 inches of ginger root, peeled and grated
1 baggie of roasted green chile, peeled and chopped (approx. 13 oz. or 1 1/2 cups)
8 cups of chopped (chunky) apples
1/4 teaspoon turmeric
1/2 tablespoon garam masala
3/4 cup raisins
1 cup cider vinegar
1/4 cup sugar or other equivalent sweetener

Put all ingredients in a large soup pot. Bring to a boil then simmer until thick, for 75-90 minutes. Can or freezer can in 8 oz containers. Makes 7-8 containers.

Cooking Beyond Recipes- Apple Stew Recipe

Nadine has an abundant apple tree and has shared a few of her recipes. She writes the “Cooking Beyond Recipes” for the blog.  Thank you for sharing!

Amy Hetager, Local Organic Meals on a Budget Blogger

Mulligatawny Stew
Adapted from Fannie Farmer Cookbook

4 tablespoons butter

2 teaspoons curry powder

1/4 teaspoon ground nutmeg

1/2 teaspoon ground cloves

1 teaspoon dried parsley (or 2 sprigs parsley, chopped; if so, add with tomatoes)

1 small onion, diced

1 carrot, diced

2 stalks celery, diced

1 bell pepper, diced

1-2 apples, diced

approximately one pound of chicken thighs, cooked and diced

5 cups of chicken broth

2 cups canned or chopped tomatoes

1 cup chopped okra

2 cups of cooked grain: rice, quinoa, other of your choice

Melt the butter in a large soup pot. Stir in the curry powder, nutmeg, cloves and parsley. Add the onion, carrot, celery, bell pepper, apple and chicken. Cook slowly, stirring frequently, until all ingredients are coated with the spices and begin to cook, 10-15 minutes. Stir in the stock and tomatoes, then the okra. Partially cover and simmer for about 1 hour, stirring occasionally. Add salt and pepper to taste and more curry powder if desired. As you serve the soup, pass the grain separately or spoon some into each bowl. Makes approximately 8 servings.

Blue Corn Raspberry Muffin Recipe

Baking muffins is an easy process. Look for local ingredients to get started at the Farmers Market, Community Supported Agriculture (CSAs) and local grocery stores. Raspberries and blue corn are in season this month in Santa Fe. I made this with raspberries from Monte Vista Organic Farm at the Farmers Market, but many farms have raspberries in season.  Blue Cornmeal is another item coming into season this fall.  I received mine in Beneficial Farms CSA, but I also see Talon de Gato sells some great looking blue cornmeal.

Here is a recipe that you can substitute other items such as grated cheese, scallions, chives, green chile and other fruit.

Blue Corn Raspberry Muffin Recipe

Adapted from Cooking Light Magazine

Preheat oven to 400 degrees

1/2 cup Plain Greek Yogurt

3/4 cup 2% Milk

1/4 cup Olive Oil

1 Egg, beaten

1 cup Blue Corn Flour

3/4 cup Unbleached All Purpose Flour (this helps the consistency of muffins)

1 TBLSP sugar

2 TSP Baking Powder

1/4 TSP Baking Soda

1/4 TSP Kosher Salt

Mix the wet ingredients together and then mix the dry. Add the dry to the wet and mix until combined. Do not overmix. Add the raspberries. Add to 12 muffin cups and bake for 13 minutes. These can also be frozen if you want to enjoy the harvest this winter. I freeze on a baking sheet and then add to a plastic bag in the freezer. It works well for potlucks and events where you need to cook and do not have time.

Enjoy!

Amy Hetager, Local Organic Meals on a Budget Blogger

Quick Food Preservation

Refrigerator pickling is one of the quickest ways to preserve your summer produce. This process keeps the vegetables crisp and is great for cucumber pickles.

It is a fast two-step process. The first is to find vegetables and cut them into wedges or slices for the canning jar. Cucumbers, carrots, beets, onions, cherry tomatoes and green beans work the best. Cutting and arranging the vegetables is the longest part of this type of food preservation. Look for interesting colors of beets and onions to make the jar beautiful. The second is to boil a brine (vinegar, sugar, salt and spices) to create a dill, sweet or savory sauce. Use a sterilized canning jar and lid to preserve this for up to a year in the refrigerator.

The Local Organic Meals on a Budget class this week included two refrigerator pickle recipes from Dena Aquilina, General Manager of Beneficial Farms CSA. Here are the recipes and the easy way to make them.  Make both of these recipes within an hour.

Beet Refrigerator Pickles $3.35 for 8 people

Store in this one quart canning jar in the fridge when cooled and do not can this recipe. Add hard-boiled eggs for a colorful protein hit – a popular street food in Miami.

4 Beets,½ Red Onion,1 cup White Vinegar,1 cup Filtered Water,¾ cup Sugar,½ tsp Kosher Salt,½ tsp Celery Seed,1 T Mustard Seeds,2 Cloves

For one quart, cook beets until just tender (fork will start to slide into beet), peel and cut into quarters or slices (don’t overcook)
Slice 1/2 medium onion into thick slices.

Boil together:1 c white vinegar,1 c filtered water, 3/4 c sugar or 1/2 c agave, 1/2 t salt, 1/2 t celery seed, 1 T mustard seed and cloves.

Pack beet and onion pieces in clean quart jar – make it pretty! Pour hot brine over, seal with new lid; cool and refrigerate. These are ready to eat when chilled and will keep in your fridge as long as you can resist eating them!

Dena’s Dills (Refrigerator Pickles) $4.56 for 8 servings
¾ cup Cider Vinegar
1-1/4 cup Filtered Water
1 T Kosher Salt
¾ T Sugar

Heat the brine together and let cool.

½ T Mustard Seeds
2 Cloves of Garlic
½ tsp Pickling Spice
1 T Dill Seed
2 lbs of Cucumbers, Carrots or Green Beans

Sterilize a Quart Canning Jar and lid. Add the spices and then sliced cucumbers, carrots or green beans.  Pour the brine over the vegetables. Keep in the refrigerator for up to 1 year. Do not can this recipe as it does not have the appropriate acid level.

Want to learn more about food preservation?  Come to Home Grown New Mexico’s next food preservation class: Sunday, September 9th at 11am at Milagro Community Garden on Rodeo and Legacy
Learn about pressure canning for low acid foods and help Jannine Cabossel and Duskin Jasper make salsa from the garden. Bring a donation and take home a jar of salsa.
Cherry Tomato and Cucumber Salad Recipe

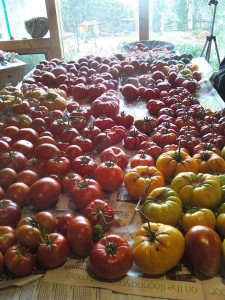
Gardeners have more luck with small tomato varieties in New Mexico. It is becomes warm here in June and has colder nights where big tomato plants don’t ripen as quickly. Brandywine is a favorite tomato, but I never got to eat them until September and it freezes in October. I have had better luck with the small ones. August is the month that the harvest season starts for these plants.  I grow cherry, grape, pear and small tomato varieties and have several pounds each week for my cooking. It is great to mix them in this salad. You can also buy small baskets of tomatoes at the Farmers Market and stores. Here is a salad that I turn to to share with my neighbors and friends.

Cherry Tomato and Cucumber Salad

By Amy

2 cups of Cherry Tomatoes

1 Cucumber

1 bunch of Scallions

2 cloves of Garlic, minced

1 tsp Mustard

1 tsp Local Honey

2 Lemons, juiced (4 TBSPs)

Olive Oil to add to the dressing

Feta Cheese to top the salad

Peel and cut the cucumber in half. Take a grapefruit spoon and remove the seeds from the middle. Cut the cucumber into four sections and dice into small cubes. Cut the tomatoes into two pieces to be similar to the size of the cucumbers. Dice the scallions and garlic to add to the salad.

DRESSING: Add the mustard, honey and lemon juice in the bottom of a bowl.  Add salt & pepper.  Stir and add as much oil as is needed for the dressing.  It should look like a vinaigrette dressing and you can taste at this point to ensure that it works for your salad. I have used limes, sherry vinegar and balsamic vinegar in this salad as well in place of the lemon.

Add all ingredients to a bowl and mix with the dressing.  Top with a handful of feta cheese and enjoy.

Amy Hetager, Local Organic Meals on a Budget Blogger